Small gardens don’t feel expensive because you’ve filled them with things; they feel expensive because structural garden works quietly organise the space. Get the bones right and your materials & surfaces suddenly look intentional, not improvised - even if you’ve bought half of them from the builders’ merchant down the road. It’s the difference between a “bit of patio” and an outdoor room you’d expect to see in a brochure.
Most people start with plants because they’re the fun part. But in a small footprint, plants only look as good as the edges that hold them, the levels that frame them, and the hard lines that stop everything reading as temporary.
The detail everyone notices (even if they can’t name it)
It’s the edge.
Not the fancy seating, not the BBQ, not the string lights. The expensive-looking small gardens have a decisive line between “this is where you walk” and “this is where things grow”, and that line doesn’t wobble, sink or fray at the corners. It gives the whole garden a sense of finish, like a well-cut jacket.
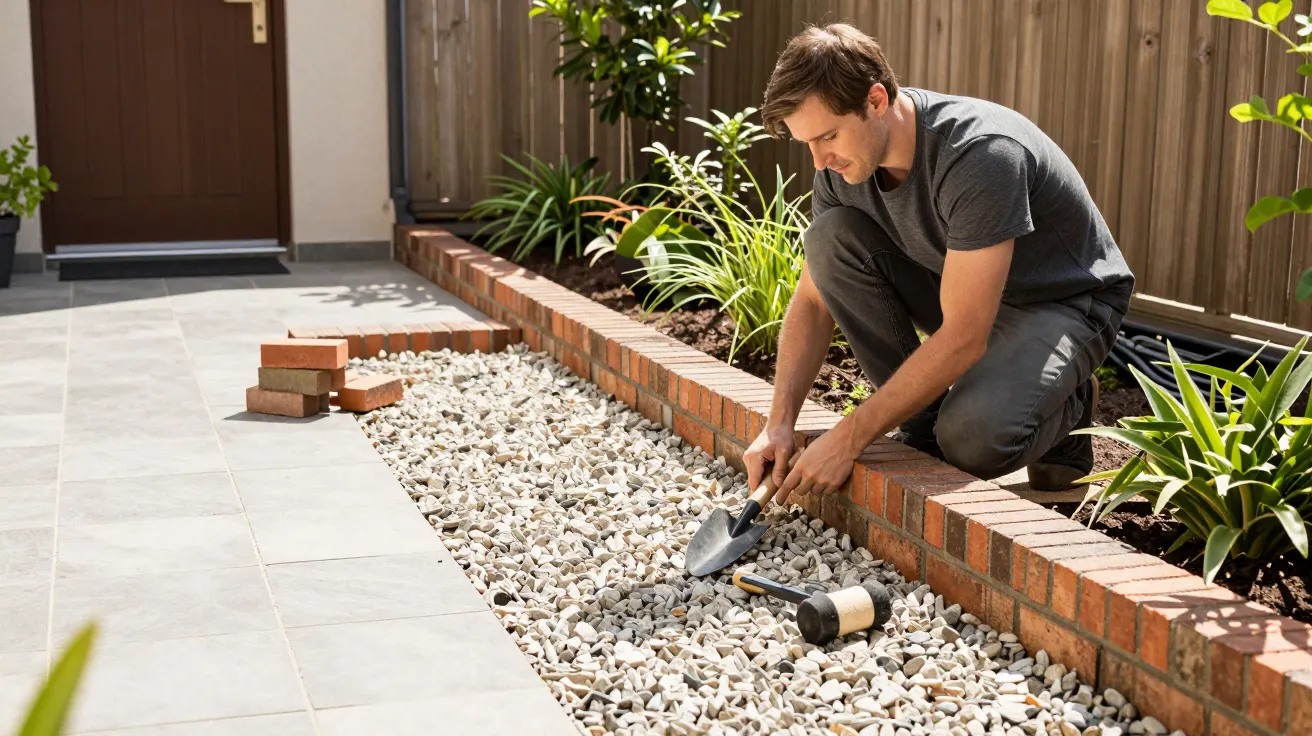
The simplest version is a raised bed with a crisp face - brick, stone, rendered block, timber done properly - running cleanly alongside paving. The more subtle version is an upstand: a low kerb that keeps gravel from migrating, stops soil washing onto slabs, and makes the space feel designed rather than accumulated.
Why edges do more than look neat
A good edge is doing three jobs at once, which is why it changes the feel of a garden so fast.
First, it gives the eye something to read. In a small garden you’re always seeing everything at once, so a continuous line instantly makes the layout feel coherent. Second, it protects your investment: paving stays cleaner, beds hold their shape, gravel stays where you put it. Third, it makes maintenance smaller, which is the real luxury in a tight space.
You can tell when it’s missing because everything blurs. The lawn creeps into borders, mulch spills, the patio looks “unfinished” even if the slabs themselves are lovely.
The “one strong line” rule for tiny spaces
If you do one thing, do one line brilliantly.
Pick a single edge that runs the length of the garden - along the patio, or the border nearest the house, or the main path - and make it straight, level and robust. It becomes the spine that makes the rest feel calm. Curves can work, but in small gardens they have to be deliberate; a wobbly curve just reads as “we made this up on the day”.
A useful test: stand inside at the back door. If your eye can follow one confident line out to the end of the garden, the space immediately feels longer and more expensive.
Three edge types that look high-end without being flashy
- Brick-on-edge soldier course: classic, crisp, and brilliant with both traditional and contemporary houses.
- Flush steel edging: minimal, modern, and makes gravel and planting look extremely tidy (it must be installed properly or it warps).
- Low masonry upstand (50–150mm): the “architect” move; it adds shadow, depth and a sense of structure.
Pairing edges with materials & surfaces (so it looks intentional)
This is where people accidentally cheapen a good build: too many finishes, too many textures, no hierarchy.
In small gardens, restrict the hard palette. Choose one main walking surface, one secondary surface, and one edging material. Then repeat them. Repetition is what reads as money, even when it isn’t.
Here’s the quiet trick: your edge should either match your paving (for calm) or deliberately contrast it (for definition). What rarely works is a third, unrelated material that looks like a leftover.
A simple palette that nearly always works in the UK
- Main surface: large-format porcelain or sawn sandstone (fewer joints = calmer)
- Secondary surface: 10–14mm gravel in one consistent colour
- Edge: brick or a slim upstand that ties to the house (lintels, coping, window brick)
If your paving is already busy - riven slabs, lots of colour variation - keep the edge plain. If your paving is very plain, you can afford a slightly richer edge.
The build detail that separates “DIY neat” from “proper job”
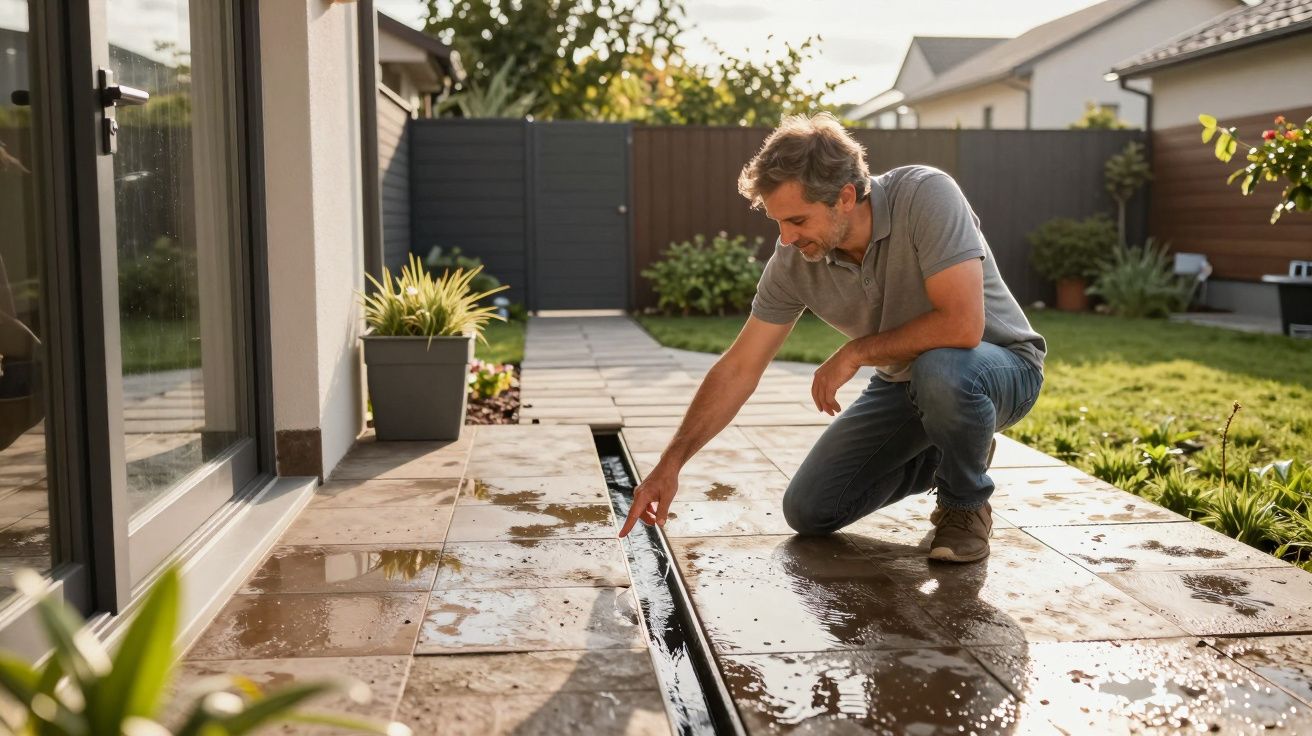
Level changes and drainage.
An expensive-looking edge is square and consistent because the base is right. That means a stable sub-base, correct falls away from the house, and an edge that’s bedded and haunched properly (especially with brick and stone). In a small garden, any settling shows immediately because there’s nowhere for the eye to “escape” to.
If you’re investing in structural garden works, put money where it’s invisible:
- Sub-base depth and compaction
- Proper restraints (so surfaces don’t spread)
- Falls and drainage details
- Copings/caps on raised planters (they hide minor imperfections and protect the masonry)
The mini “expensive garden” checklist
Walk outside and look for these tells. If you can tick most of them off, the garden will read as higher-end even before you plant a thing.
- The main edge is straight/consistent from one end to the other
- Materials repeat and the palette is limited
- Gravel is contained and doesn’t spill onto paving
- Beds are held (no crumbling timber, no collapsing borders)
- Paving joints look intentional (not a patchwork of widths)
- There’s at least one element with height (upstand, raised bed, step)
A small garden doesn’t need more stuff. It needs one or two structural decisions made with confidence, then finished with materials & surfaces that don’t fight each other.
FAQ:
- Is edging really worth paying for in a small garden? Yes. In a tight space, edges are always in view, and they control how every surface and bed behaves over time.
- What’s the most cost-effective “expensive” edge? Brick-on-edge is often the best balance of price, durability and finish, especially if it links to the house brickwork.
- Do I need raised beds to get this look? Not necessarily. A low upstand or a well-installed metal edge can give the same crisp separation without taking up much space.
- How many hard materials should I use? Aim for three: one main surface, one secondary surface, and one edging/vertical material. Repeat them rather than adding more.


Comments (0)
No comments yet. Be the first to comment!
Leave a Comment